How To Use GD Print's Design Tool
How to use the GD Print Design Tool
Creating custom print designs has never been easier. At GD Print, we’ve developed an intuitive online design tool that gives you full creative control—without the need for expensive software or design experience. Whether you’re designing business cards, flyers, posters or gift items, our tool offers a wide range of features similar to popular platforms like Canva. You can drag and drop text or images, layer content, adjust layouts, and preview everything in real time—right in your browser.
In this guide, we’ll walk you through how to use the GD Print Design Tool step by step, so you can create professional, print-ready artwork with ease and confidence.
1. How to find the Design Tool
Getting started with the GD Print Design Tool is quick and easy. Just follow these simple steps to access it: • Step 1: Browse our website and select the product you’d like to customise (e.g. business cards, flyers, posters). • Step 2: Click the “Get Started” button on the product page. • Step 3: Choose the “Design Your Own” option when prompted. Once selected, the design tool will launch in your browser, allowing you to start creating your personalised print layout from scratch or by using one of our ready-made templates. You don’t need to download anything—everything works online, right from your desktop or mobile browser. |  |
2. A brief overview of the Design Tool
The GD Print Design Tool gives you complete flexibility when working with text—perfect for creating polished, professional layouts with ease.
Text:
How to Add Text: • Drag in a pre-designed text element from the template library • Or click to add your own custom text box Once the text is on your canvas, you can move, resize, and rotate it as needed. Text Editing Features: Our text tool includes all the formatting options you’d expect—similar to Microsoft Word or Canva: • Change font style, size, and colour • Apply bold, italic, or underline styling • Layer text on top of images or other elements • Adjust line spacing and alignment Advanced Options: • Apply special effects such as shadows or outlines • Change the opacity of your text for a more subtle or layered design • Group multiple text elements together for easy positioning |  |
Images:
How to Add Images: • Upload directly from your device (JPEG, PNG, SVG supported) • Access your Image Gallery from the left-hand image panel • Add images from your connected social accounts: • Social media: Facebook, Flickr and Pixabay (royalty-free stock photos) Accessing Your Image Gallery: • From within the design tool via the “Image” tab • From your profile page under "Image" Not sure what image to use? Under the Image Gallery tab, you’ll also find a selection of high-quality, ready-made visuals Customisation Options: Once an image is added to your design canvas, you can: • Resize, rotate, or reposition it anywhere on the page • Layer it behind or in front of other elements (like text) • Adjust opacity for layered effects |  |
Clip Art:
What You Can Do: • Choose from Pre-Made Shapes: Access a wide selection of clip art shapes from our library. • Drag & Drop: Simply drag the desired shape onto your design canvas. • Customise the Shape: • Outline or Filled: Choose between an outlined shape or a solid filled version. • Adjust Colours: Change the outline colour, fill colour, or both. • Resize: Scale shapes to fit your design perfectly. • Adjust Opacity: Create subtle or bold effects by changing the transparency. This feature makes it easy to add decorative elements, highlight important details, or create a unique design layout without needing external software. |  |
3. Saving and Viewing your Designs
Saving your work is easy with our GD Print Design Tool—but remember, you must be logged into your account to access these features.
How to Save Your Design Click Save at the top of the page once your design is ready, you can also: • Preview as a PDF to see how your final product will look. • Purchase the product • Adjust the size of your design How to View Saved Designs • Navigate to My Account > Portfolio, here you can view all your saved designs • Here you can edit, order and preview just like within the design tool. Important: You must be logged in to save, view, or edit your designs. | 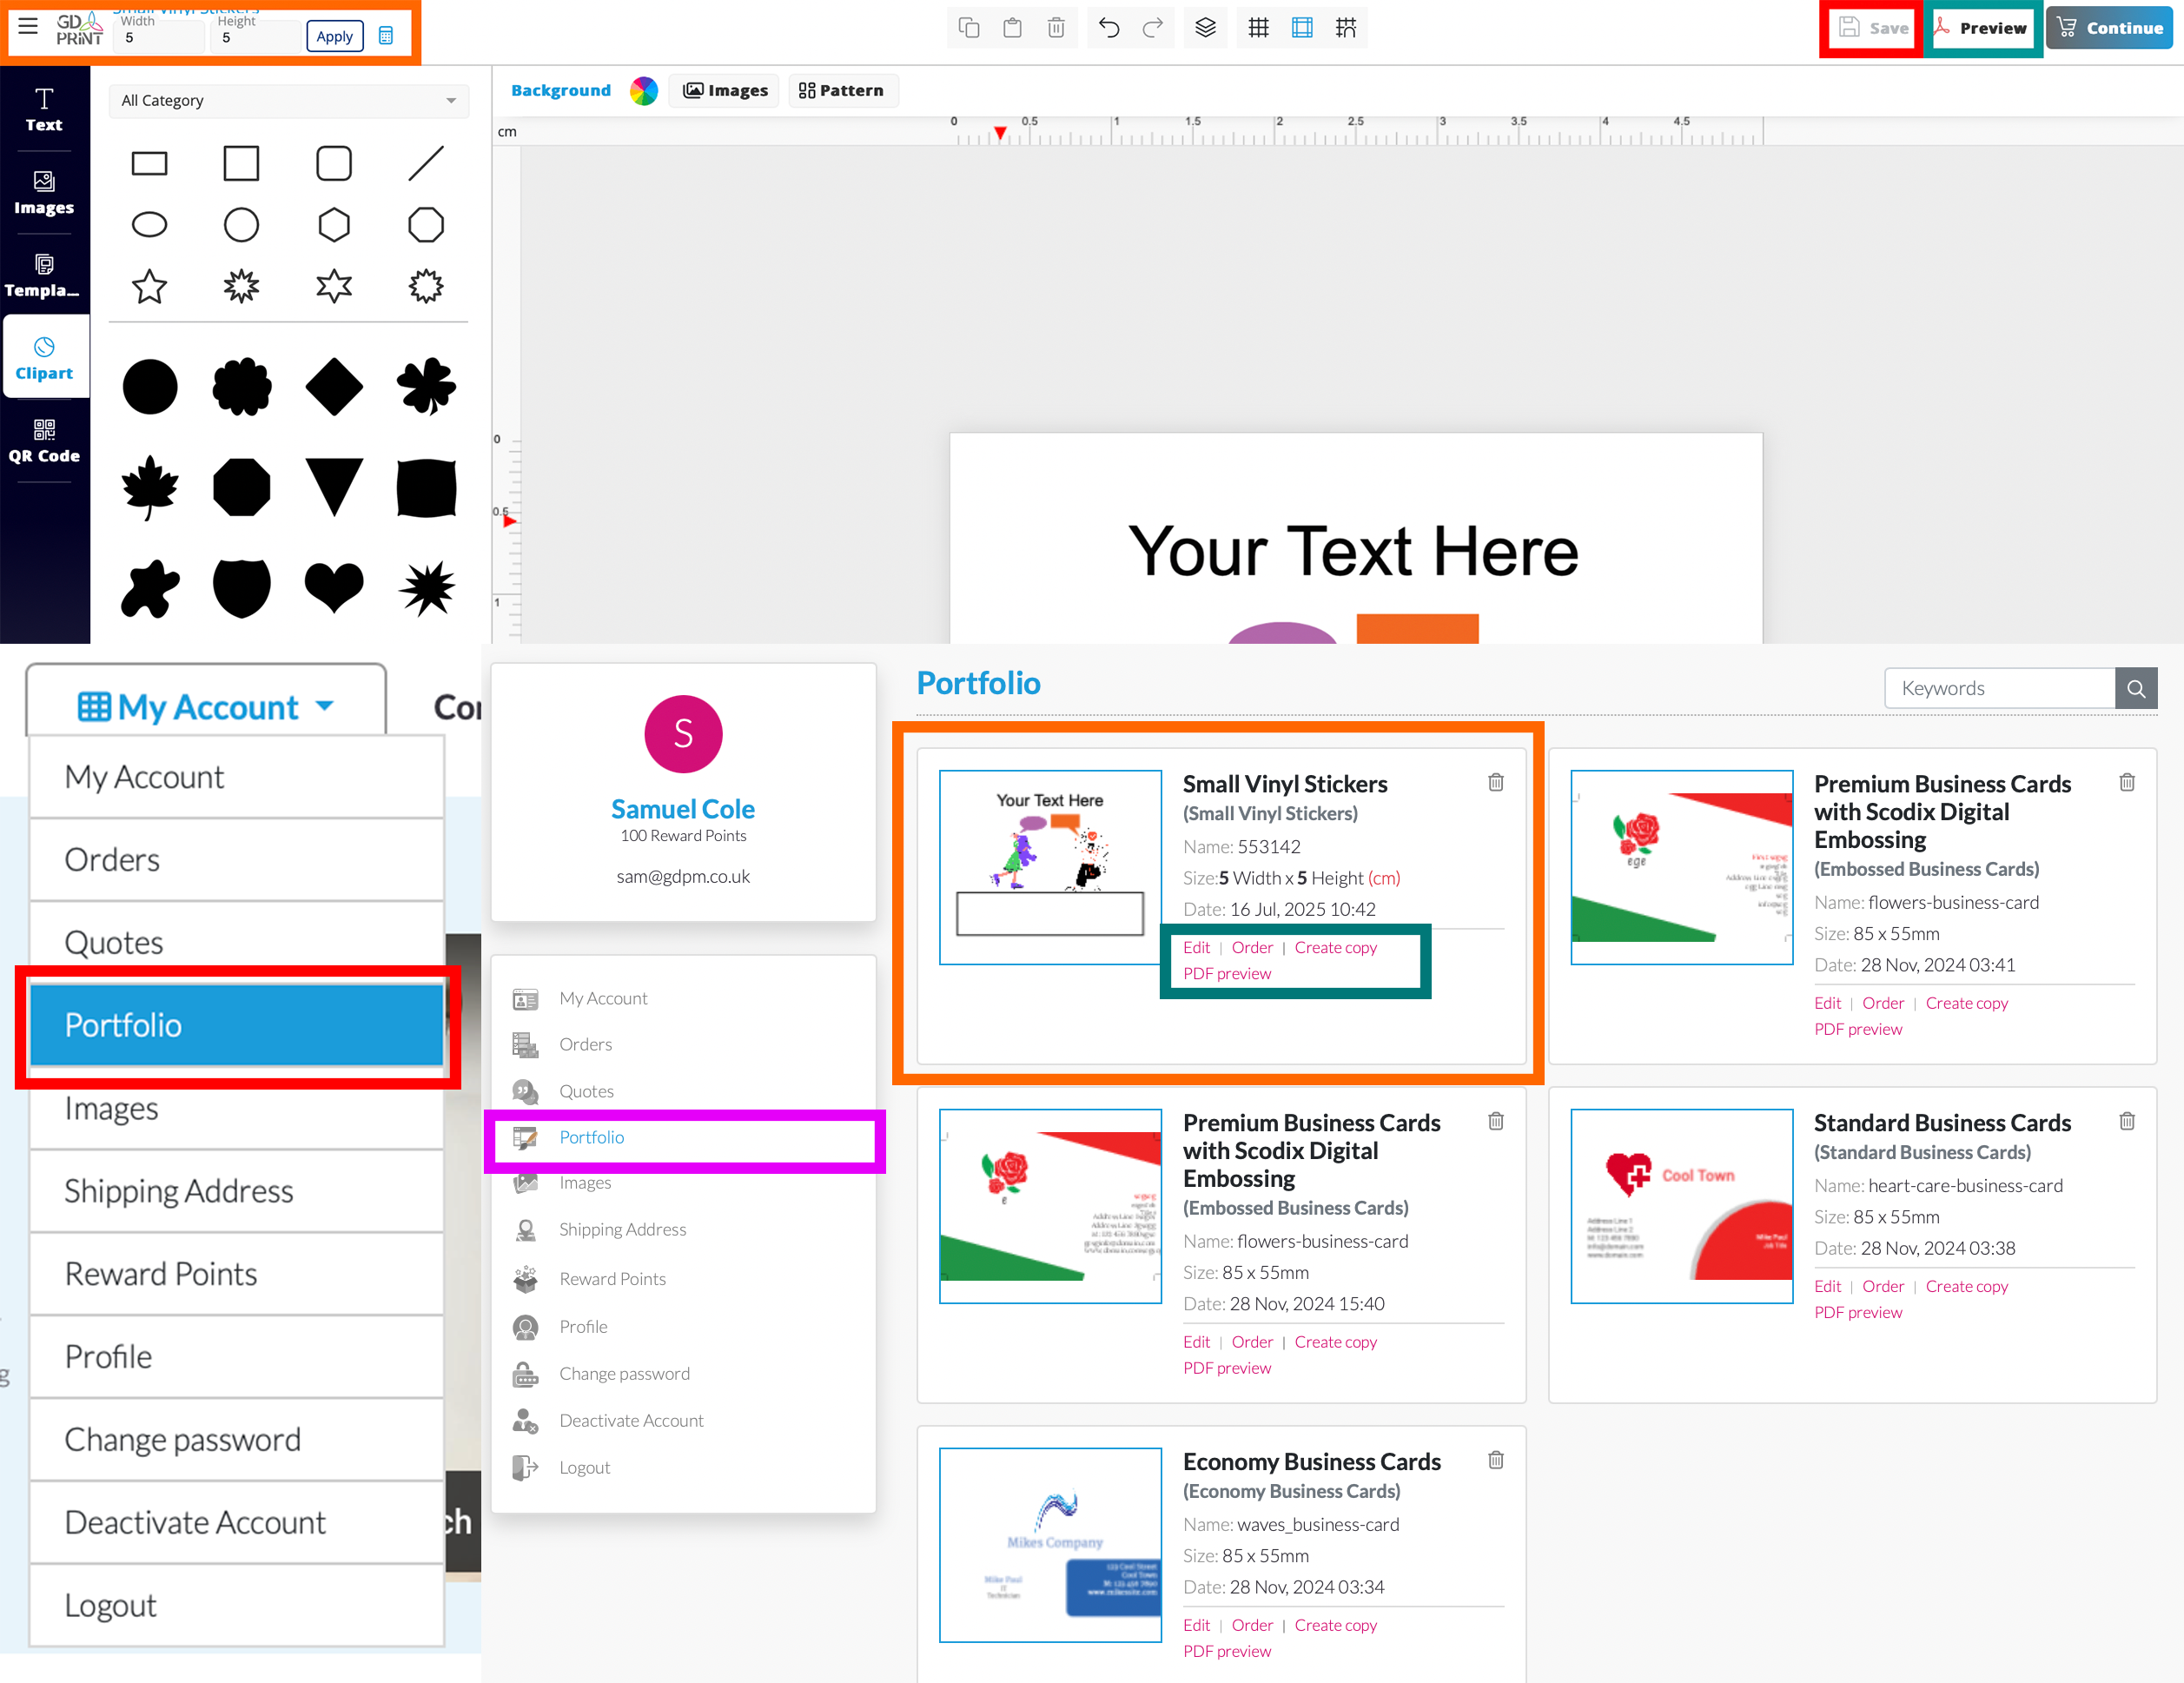 |